Installing Linux 101
Welcome to saying "I use Arch btw" at every conceivable moment.

This guide is going to walk you through installing Arch Linux and the basic configurations you will need in order to accomplish this. I m going to assume you have some basic understanding of computers for this guide - so if something is unclear you may need to search around for answers outside of this blog - but the key words here should take you to what you need to find. Googling "Arch Linux installation media" for example pulls up a host of useful results, and you can narrow it down further to tailor your needs.
The first thing we're going to need to do is download the actual operating system. I am going to use Arch for a few reasons: first, it's what I'm familiar with. Arch Linux has been my go to OS for a couple of years now, and I've learned a few tips and tricks. I also have a pretty simple setup for a more secure desktop experience that doesn't sacrifice usability or accessibility. Is it as secure as something a little more... cumbersome? No. But it does offer more security than nothing at all with a little extra setup effort, but not much afterwards. I also want to demystify the install experience a bit. Arch Linux has been, for years, thought of as a "difficult operating system" because of the lack of an install script. We won't be installing it that way today, but if you'd like to try sometime (I recommend doing so eventually as you will become much more familiar with your operating system and its components) I'd check out the Arch Wiki's Installation Guide. This actually segues nicely into my next point, Arch Linux's biggest strength is the community: specifically the Arch Wiki. This encyclopedia will be your best friend in answering any strange questions you may have - and if it doesn't or you can't find it, I've found the forums to be a lot more friendly (albeit curt) than most other forums around the web.
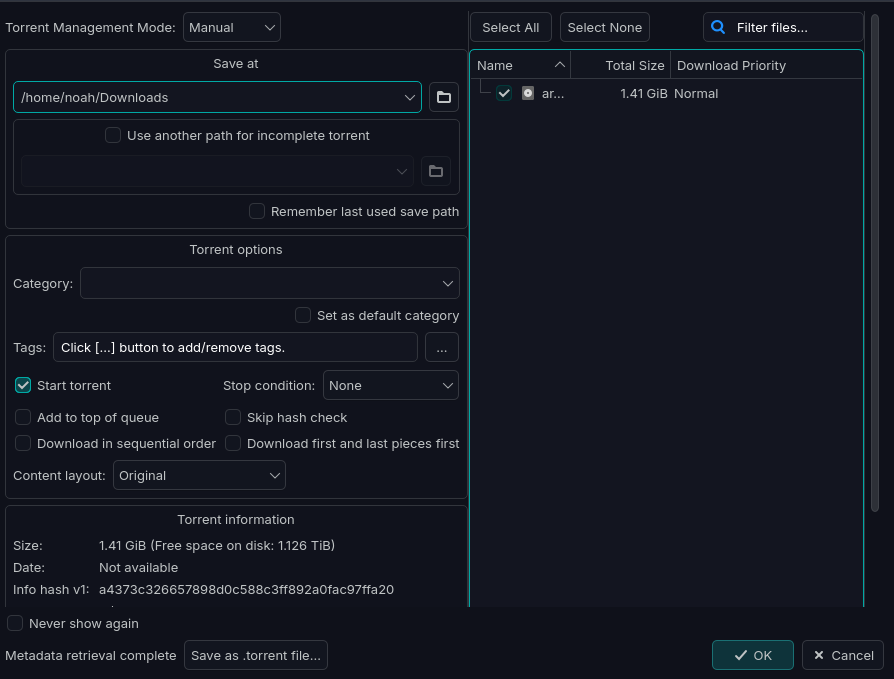
With that being said, let's dive in. The first thing we will need to do is, of course, set up the installation media. The download page for Arch can be found here, and the recommended medium for downloading is a magnet link. I recommend you use qbittorrent for the download, you should get a screen similar to this asking where you want to save the file.
Once you've done that burn it to a flashdrive using a boot media creation tool like Rufus (Windows), Etcher (Mac), or DD if you are on Linux already (though I'm not quite sure why you'd be reading this guide)
Boot to a temporary starting device on your computer with the drive plugged in and choose the newly created drive. You should end up on a screen pretty similar to this.
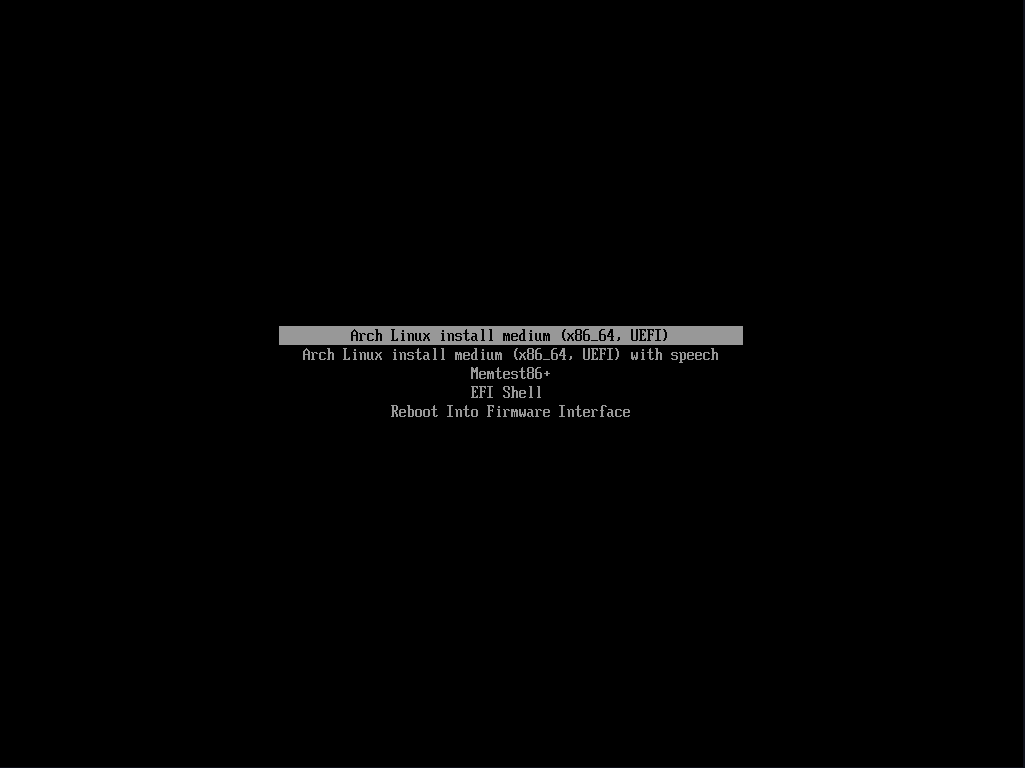
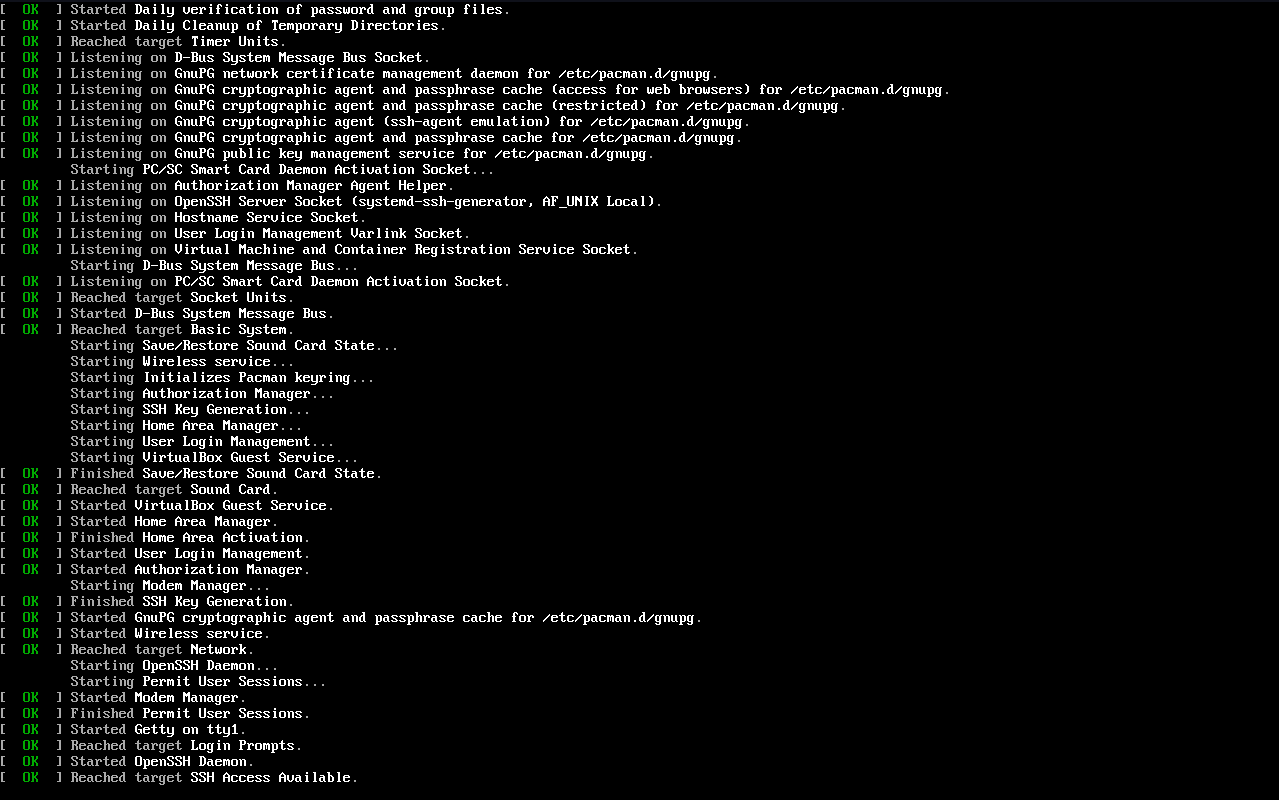
Click the first option - the second if you want speech - and you should see a cascade of [ OK ] text lines followed by what is happening. You don't need to pay attention to this unless you see a red line, that may indicate a specific problem.
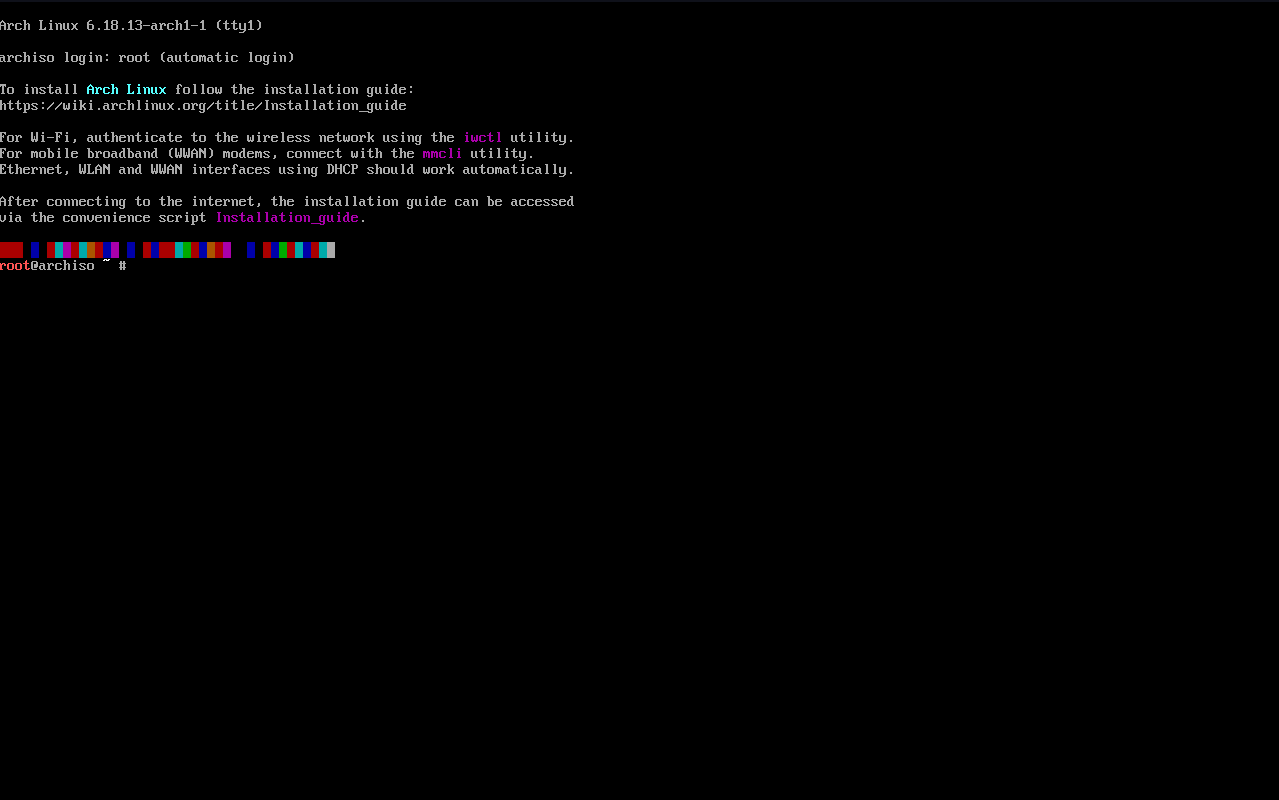
After that you should see this screen.
The first thing we need to establish is an internet connection. If your computer is wired in (recommended for minimal configuration) you should be able to type
ping archlinux.org
and have it give a response like this:
PING archlinux.org (2604:cac0:a104:d::3) 56 data bytes
64 bytes from 2604:cac0:a104:d::3: icmp_seq=1 ttl=55 time=11.6 ms
You should see lines ending with time=5.1 ms or some other response time. If you don't, you aren't on the internet! If you need WiFi set up, we can handle that next.
(Pro tip: you can hit tab halfway through most commands and they will autocomplete. Not useful for "ping" but if you are typing "systemd-socket-activate" it comes in handy. Start using it early and you will get years of your life back.)
WiFi is pretty simple to set up, you just need a few commands. For a more in depth explanation of each command, or for more steps if you need to troubleshoot, check out this article on the Arch Wiki. But I'll go through the quick version here. Just type these commands
iwctl
will launch the wireless connection terminal. You can exit any time by typing
exit
Your normal terminal commands won't work here - instead there are a predefined list of commands that you can use.
iwd device list
will show you a list of your physical interfaces on your computer. If your WiFi adapter is off, turn it on with
iwd device (device name) set-property Powered on
Remember, Linux is case sensitive. The "Powered" in "Powered on" has to have a capital "P" or you will get an error. Once the device is on, let's find networks in range with
station (device name) scan
then, we list the names of networks we found
station (station name) get-networks
Last, we connect with this command
station (SSID name) connect SSID
Now exit, and try to ping again. Does it work? If so you are ready for the next step! If not, don't fret. Try running the connection again - if you continue having problems, restarting the installation process can fix a lot of issues, but if not, search the wiki for information. If you are banging your head against the wall it means you are learning.
Now that we have that taken care of, let's run the install script. This script makes it a lot easier to set everything up by handling the usual setup parameters automatically - if you don't see what you want in here, you may need to install the hard way, but that shouldn't be a problem for your first install, and almost anything can be changed retroactively anyways. To start, enter
archinstall
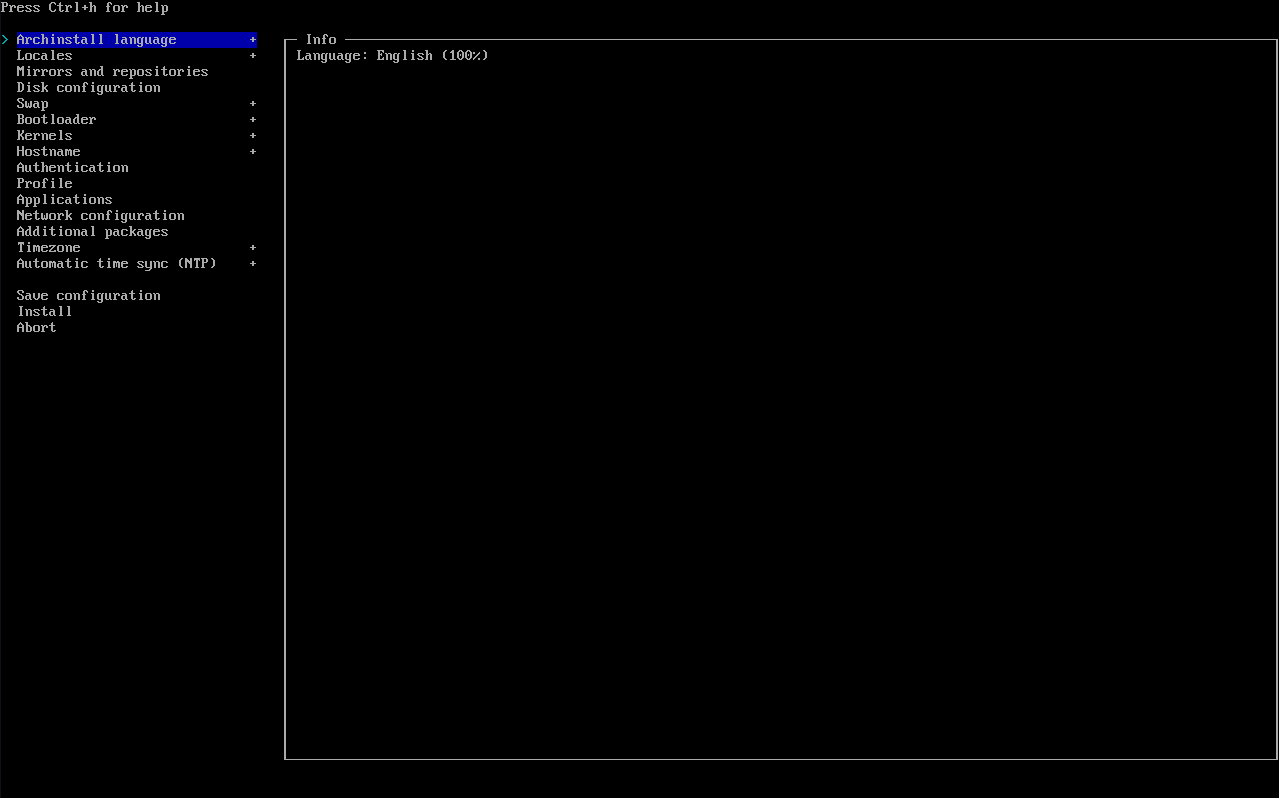
which will bring you to a screen similar to this:
Navigate up and down with arrow keys, and enter. To search any of the menus, you can usually type
/search query
and find what you need. I'll give a quick rundown of each of these options, and then a more in depth rundown for the ones we will be changing.
Archinstall language: Select the language. What it says on the tin.
Locales: Which keyboard types and languages your keyboard uses.
Mirrors and Repos: Which location you want to download packages from. A further location will slow download speeds.
Disk Configuration: How to configure the install disk. We will dive into this later.
Swap: This is a nifty Linux feature called swap space. I won't go into details, but you can read more about it here as it is out of the scope of this article. It is generally recommended to leave it on.
Bootloader: You can choose a bootloader. Leave this on systemd-boot unless you know what you're doing or don't have UEFI. Read more about bootloaders here, or BIOS and UEFI here, but generally speaking, BIOS is only on older devices.
Kernels: Choose a kernel. I generally stick with the normal "Linux" Kernel, but you may want to change it depending on your usecase. If you're just starting out, this isn't a good place to focus a lot of energy, just leave it.
Hostname: Change your computers name.
Authentication: Where you set up initial user accounts. We will dive more into this later.
Profile: Your desktop environment, we will dive into this more later.
Applications: Where you configure audio, Bluetooth and printers.
Network configuration: You can configure network options for post install environment.
Additional packages: Leave this alone - we can install packages after we install the OS.
Timezone: Again, what it says on the tin.
NTP: Whether you want to sync your time automatically to a special server just for that. Don't touch this unless you know what you're doing.
Most of these are pretty self explanatory (or you should have a good enough idea from the descriptions above) but there are a few options I will go over here now in more detail. This is where my guide will become much more specific to a setup that I use for a good starting place for a desktop with a little extra security and usability. First thing to go over is the disk configuration. When you select it, go ahead and select the "best effort" partition method and you should land somewhere that looks like this:
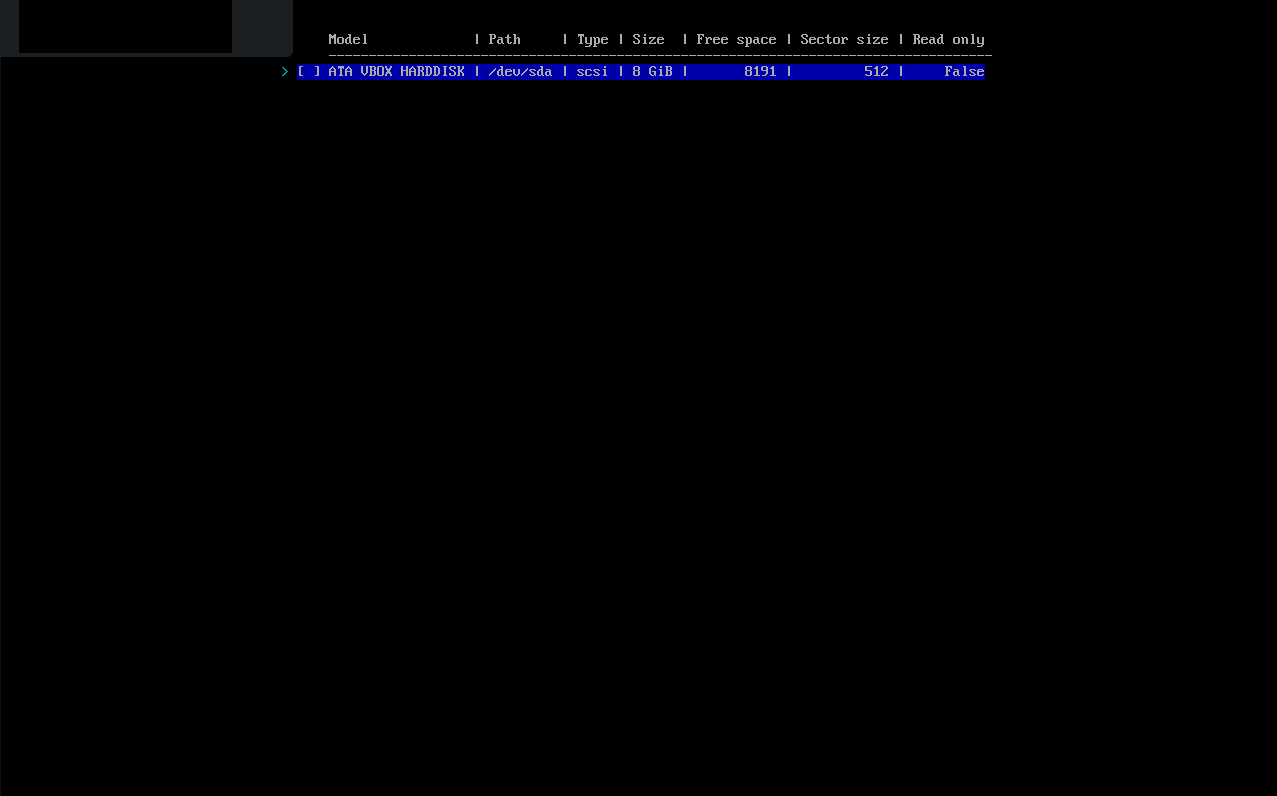
Select your disk and find yourself here:
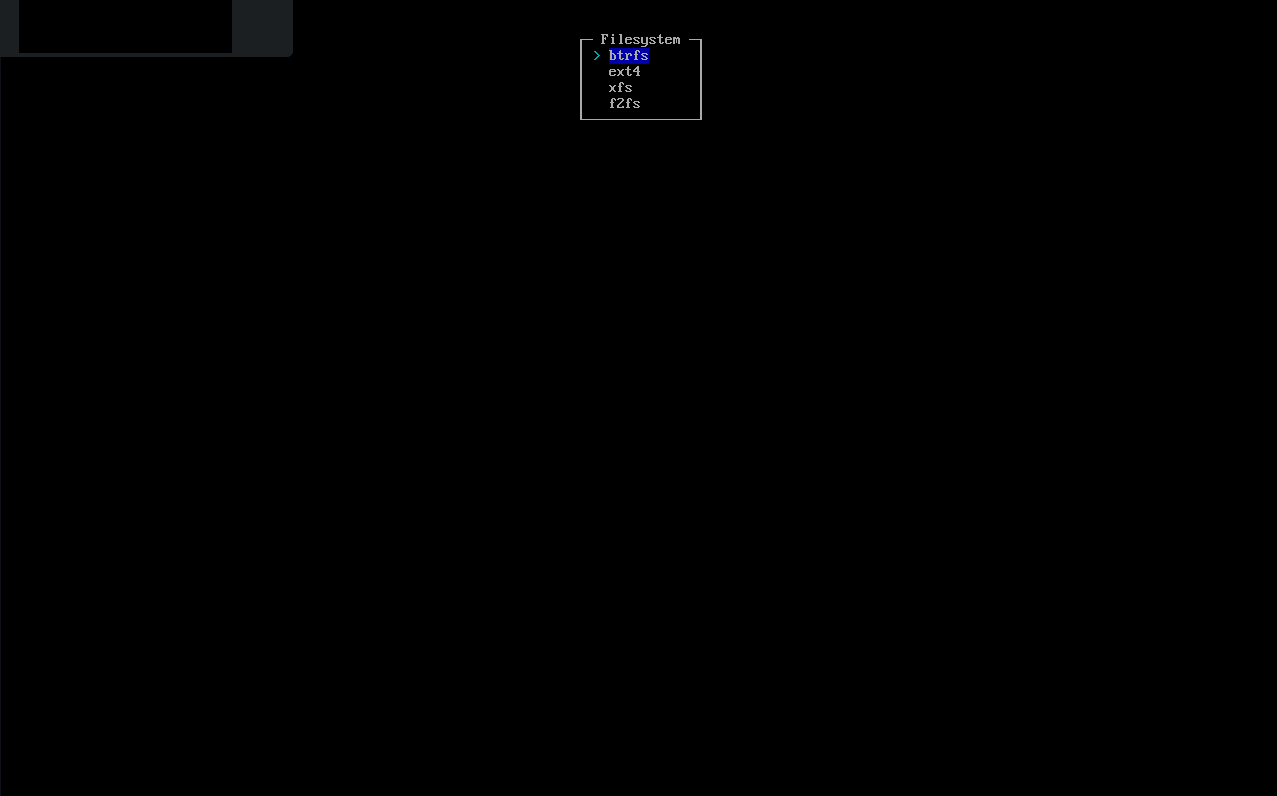
We want btrfs. Use the default options: yes to default structure, use compression. Then in the next menu, select Encryption, then Encryption Type, LUKS. This will encrypt your hard drive so that it can't be so easily accessed. Enter a password (Something strong but memorable - if you want to know how strong it is, you can use this password tool on my site) then check that your partition is selected in the Partitions section. After that hit back and we are done setting up the FS! Not so bad. We use btrfs here because of the feature set. It allows us to back up save states of the file system that we can revert to. Probably not a great idea on my "8 Gib" hard drive, but on modern hardware it will work well. This allows us flexibility to revert software updates, recover deleted files, and flash back to that version of your document before your cat sat on your keyboard, deleting hours of work. (If Ctrl-Z isn't an option for some reason). On older machines, you may want a more light weight FS, but this guide really assumes newer hardware to some degree.
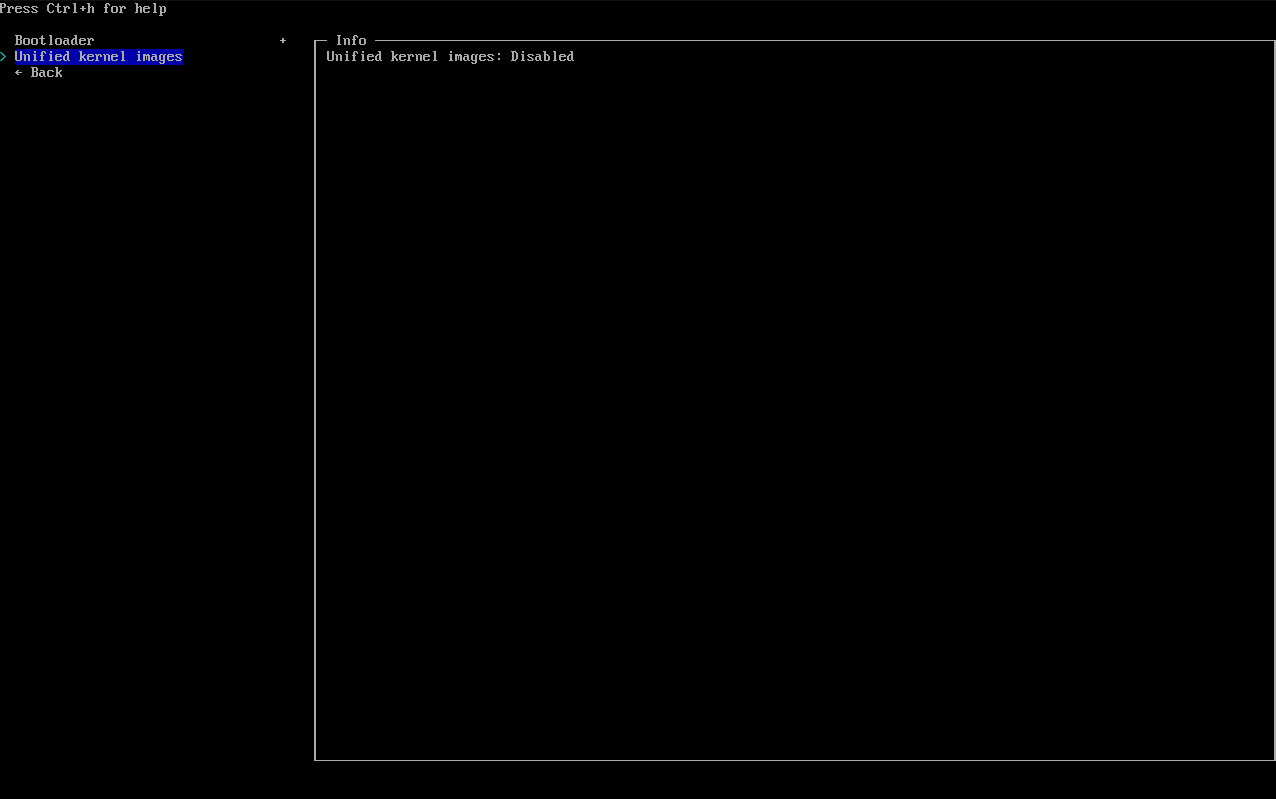
After that, let's hop into the bootloader menu where you will find an option called "Unified Kernel Image" which we want to turn on. This basically combines all of your boot sections, but if you want an explanation that isn't simplified to the degree of being wrong, I'd read up on it more here. Again, it's out of the scope of this article. Just know that in my future posts, if I make changes to boot behavior, that is what will be set up so you may not be able to follow along if that's not what you are using.
Once done there, let's head to Authentication. Here you will see this screen:

You can set a Root password if you like, but it isn't really necessary in most cases. Just choose User account, enter a name, password, then add yourself to Sudoers (more on that in a later article) and move on.
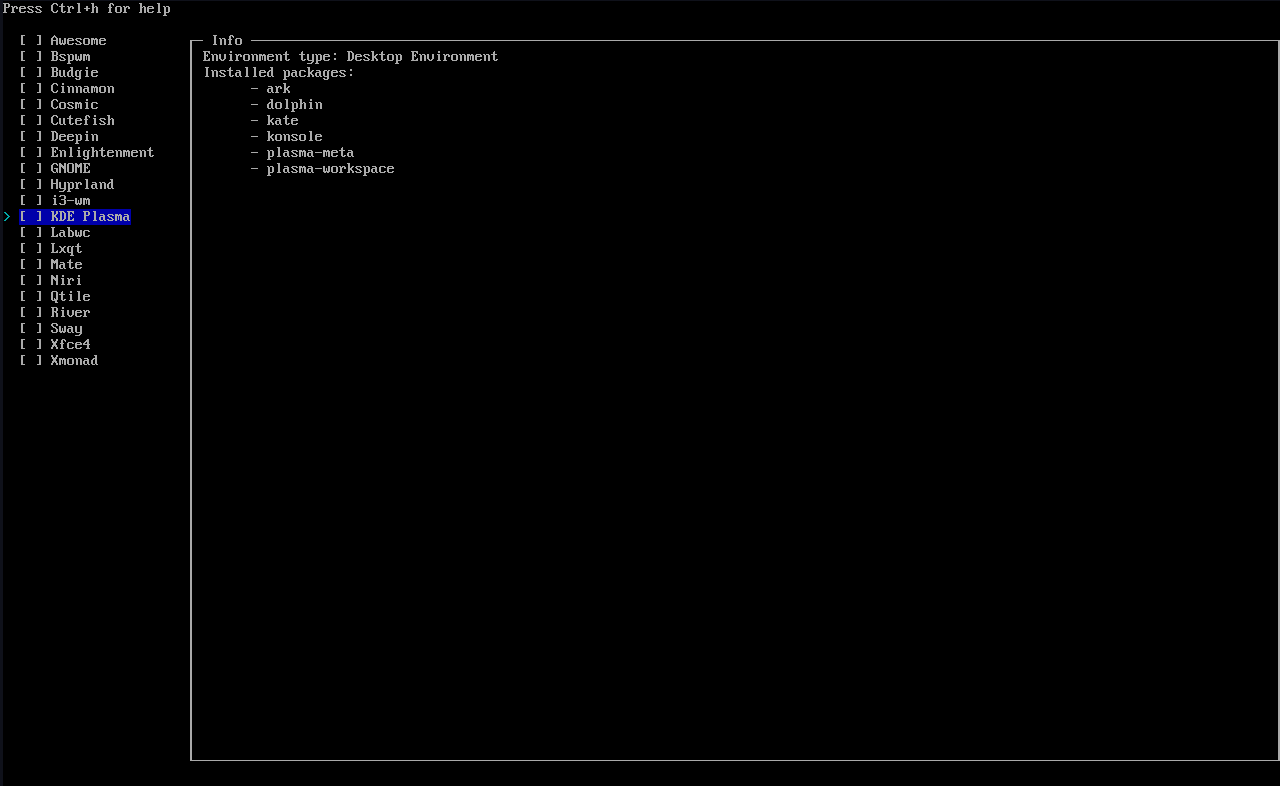
Next we are moving on to the Profile selection! This is really the best part. The profile you choose will determine how your desktop environment looks. (Be sure to choose Desktop, not Server or Minimal). Screenshots of these are notoriously hard to find, but the typical choices are between Cinnamon, Cosmic, GNOME, KDE Plasma and XFCE4. There really are no wrong answers here and this can be changed any time. I recommend KDE if you are switching over from Windows or Mac, or if you want to try something really new, Hyprland. I'm going with KDE here.
We also want to select a greeter here. Choose lightdm-slick-greeter if you want to follow along in future episodes, but this can be changed anytime and again: no wrong answers here. Basically the greeter just loads your desktop environment and a few modules.
Next in network configuration choose "Use Network Manager (default backend)" as that is what KDE uses (but you may want to read into your desktop environment if you did not choose KDE), select a timezone and that's it! We are ready to install.
Click install and sit back while the credits role. You're practically done. Once that finishes, reboot the system, enter your encryption password, your user password and you should be in your new desktop environment.
Congrats on the successful installation of the most "difficult to install" operating system of all time!
